
You want to know the secret to creating a great image? Being able to pre-visualize the image in your head before you ever begin. You begin at the end, then open yourself to the creative process as you work towards that vision.
Many photographers struggle with creativity in the studio. It’s difficult to find the organic inspiration you find working on location. Working in a studio with professional lighting gear can be intimidating and challenging. Lensbaby optics are a wonderful way to infuse a creative spark.
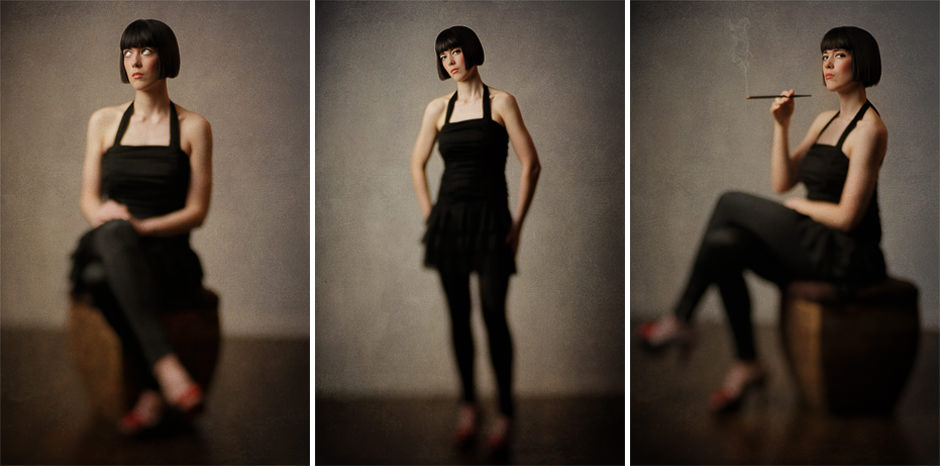
I wanted to create a turn of the century, vintage-inspired portrait with the Edge 80 from Lensbaby. My friend Alain from Oblique Foto, suggested model Rio Vance, who has a Parisian look that reminds me of Audrey Tautou from the movie Amelie. I could already see the image in my head.
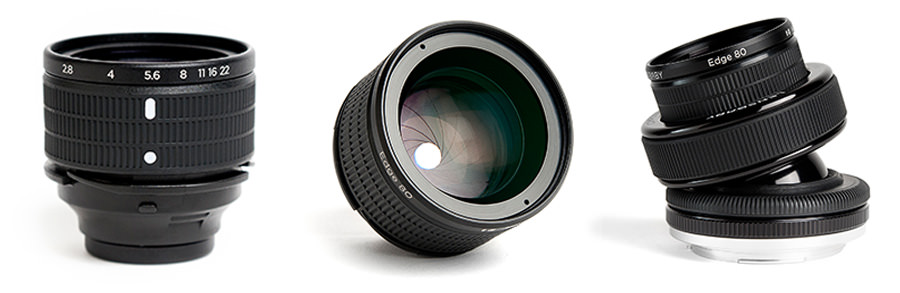
The Edge 80 is unique in the Lensbaby lineup because it’s optically corrected across the lens—a flat field optic with a plane of focus that mimics a view camera or tilt shift lens. Traditional Lensbaby optics feature a sweet spot of sharp focus with blurred edges.
One of my favorite quotes by Alfred Stieglitz is “Technically perfect, pictorially rotten.” Meaning an image can be technically perfect, but it lacks that special something. For storytellers, it’s about capturing an authentic mood and feel. And what better way than with the characteristic smeary blur of a Lensbaby! Really, you ask? Are you afraid of the blur? Don’t be! Embrace the blur!
When you close your eyes and think of a favorite memory, is it in perfect focus? No! There’s a reason dream sequences in movies are always blurry. Lensbaby optics are unique in their ability to render this elusive and creative quality. But how does this translate to a portrait shot in the studio?
Lighting the Portrait
I kept things simple. One light. One reflector. A single light source that was reminiscent of a vintage portrait studio in Paris. A single, small soft box (camera left) slightly higher than her head and a reflector (camera right).
The white studio wall was my backdrop. By placing my model away from the wall and feathering my light, it skimmed the wall and helped create a mood. Setting up my camera on a tripod, I composed my image and worked on focusing.
Focusing the Lensbaby Edge 80 Optic
The Edge 80 optic’s plane of focus is like a working with a sheet of glass. When you are parallel to your model, the plane of focus is sharp across the image. Once you tilt the lens, the plane of focus shifts as if you were tilting a piece of glass. I wanted the focus and attention on Rio’s face, so I tilted the optic down, then re-focused on her face.
Lensbaby optics are totally manual. Your focus and exposure are all done manually. This requires a shift in the way you think and work, but it’s easy once you embrace it. Focusing is the trickiest part of using a Lensbaby and there are a couple of ways to do it.
My favorite method is simply using the LiveView mode of my Canon 5D-Mark III. This allows me to see and adjust focus in real time. I composed my portrait, tilted the lens until I saw the amount of blur I wanted and then zoomed in to my model’s face to fine tune focus. This requires your model to remain still, both during setup and shooting.
Another method that was shared by Patrick Shipstad is to use an LED flashlight and shine it on your model’s face, so it’s easier to see and make fine focus adjustments. Be sure to tell you model so she’s not blinded by the light! Manually focusing is easier when you are outdoors, as there is so much more ambient light. A Composer Pro greatly increases your ability to focus.
Determining Exposure and Controlling Focus
The last step before shooting was to determine my exposure. Remember that in the studio, you are shooting completely manual. That means setting your ISO, your aperture and shutter speed manually. I set my ISO to 100 and my shutter speed to 1/125th of a second. The Edge 80 features a built in aperture ring, so I dialed in an aperture of f/4 and fired off a quick test shot. Most times, I use a light meter, but I was racing the clock, so I relied on my histogram to determine exposure.
The first shot appeared to be overexposed by 2 stops, so I dialed the aperture down to f/8 and fired off another test shot. Perfect exposure. Nice and moody, with plenty of detail in my model’s face. But the increased depth of field minimized the blur effect. I wanted the shallow depth of field of an f/4 aperture, so I needed to figure how to get there.
There are (4) variables to consider when determining exposure in the studio. ISO, Aperture, Shutter Speed, and Flash settings. My ISO was as low as it could go (ISO 100), with a shutter speed of 1/125th. I needed f/4 to get the depth of field I wanted, so I needed to change the light settings to get a proper exposure.
Remember that f/stop controls flash and shutter speed controls ambient. Studio flash is a constant. A burst of light. Changing my shutter speed essentially changes nothing. Ambient light usually isn’t a factor in the studio. That meant I needed to change the output of my light. By lowering the power of my light and moving it back slightly, I could get the settings I wanted.
Post Production and Color Grading
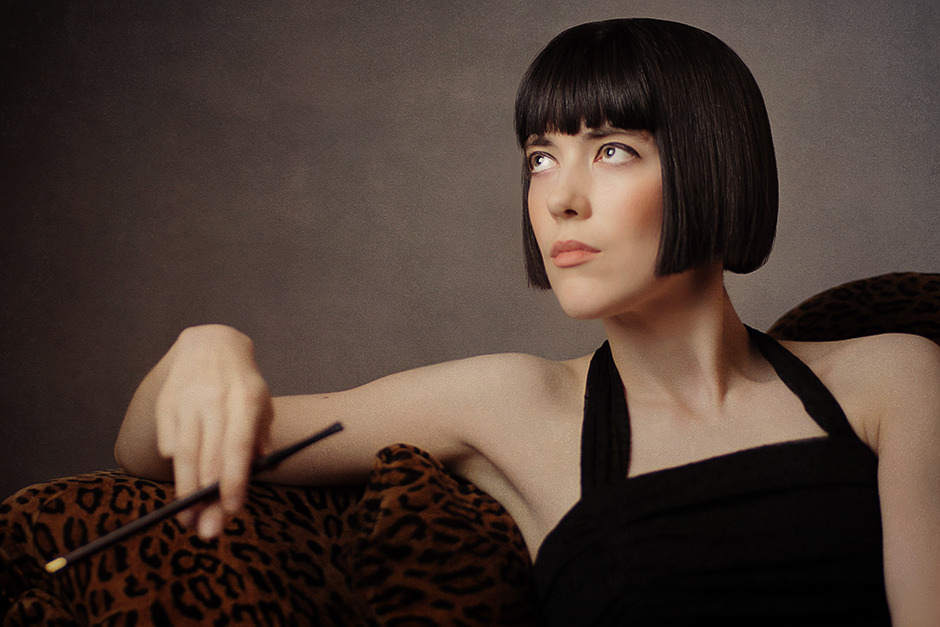
The final series of RAW image files were processed in Lightroom and brought into Photoshop for color grading, retouching and artistic enhancements. The model’s skin and makeup required very little retouching. I used RadLab and a custom recipe I created called Portlandia for color grading and finished with a texture overlay. The final mood and feel of the image is what I envisioned before I ever started.
Final Thoughts on Using the Lensbaby Edge 80 for a Studio Portrait
The question I hear most from photographers when I show them my Lensbaby images is why even bother? You can do it in Photoshop! My answer is that it’s completely different and that a Lensbaby gives you creative freedom and a process of discovery that you can’t get in Photoshop.
Sure, there are filters and blur effects you can get in Photoshop, but it still looks different from the organic lens optic effects you get from a Lensbaby. The transitional blur that you get with real optics differs from making a selection in Photoshop and blurring it. The word magical comes to mind. It’s the process of creation and discovery that creates magic. I have yet to see anyone Tweet or post on Facebook, “Just finished the most amazing post production session in Photoshop!” Being an active participant in the creative process connects you to the mood and emotion of the image. Your engagement breathes life and energy into the process.
Don’t be afraid to take your favorite Lensbaby optic into the studio. It’s no different from using it outside the studio. Just remember, it’s a manual lens. A tool that brings fresh energy to your creative space. Embrace the blur!
Have questions about using the Lensbaby Edge 80 optic? Don’t be shy! Inspire a conversation by leaving a comment. Share your thoughts. Do you like the way this looks on portraits? Let me know what you think!


This Post Has 2 Comments
A gorgeous translation, Randy… start to finish!!
Great article Randy! Well explained and inspirational… and I LOVE LOVE LOVE the photos.. 🙂
Comments are closed.